Lip liner has reclaimed its place in beauty routines, moving from its 90s heyday into the modern makeup artist's essential toolkit. Yet despite its popularity, many users skip crucial steps that separate a polished, long-lasting lip from a patchy or feathered finish. Professional makeup artists emphasize that correct application transforms lip liner from a mere outline into a performance-enhancing foundation for any lip look.
Understanding the mechanics behind liner application—from prep work to blending—unlocks versatility. Whether the goal is subtle definition or a sculpted, camera-ready pout, the same fundamental principles apply. With 3 to 5 deliberate steps, anyone can achieve results that rival salon work, provided they follow expert-recommended techniques and avoid common pitfalls.
Why Professional Techniques Matter
Amateur application often results in visible, harsh lines that age the face or lipstick that migrates into fine lines within hours. Professionals approach lip liner as an architectural element: it establishes boundaries, creates optical illusions, and serves as an anchor for pigment. When executed correctly, liner prevents feathering—the bleeding of color beyond the lip edge—by creating a waxy barrier that lipstick cannot cross.
Makeup artists also use liner to adjust perceived lip symmetry without cosmetic procedures. By slightly extending one side or evening out a naturally uneven Cupid's bow, subtle corrections become invisible to the eye yet impactful in photographs and face-to-face interactions. This technical precision requires steady hands and knowledge of facial anatomy, but the skills are learnable with consistent practice.
The resurgence of matte liquid lipsticks has made liner even more critical. These formulas, while long-wearing, can emphasize texture and dryness. A well-applied liner base smooths the canvas and provides a color foundation that extends wear time by 2 to 4 hours compared to lipstick alone.
Foundation Work: Preparing the Canvas
No liner technique compensates for neglected lips. Dead skin creates an uneven surface that catches pigment, resulting in patchy color and emphasizing texture. Begin by gently exfoliating—a soft-bristled toothbrush or a sugar-based scrub removes flakes without irritation. Perform this step 10 to 15 minutes before makeup application to allow any redness to subside.
Hydration follows exfoliation. Apply a nourishing balm or treatment mask while completing eye makeup and foundation. This multi-tasking approach allows emollients to penetrate deeply. Before applying liner, blot excess product with a tissue; lips should feel supple but not slippery. Residual moisture prevents liner from adhering properly and can cause color to slide.
Some artists recommend a final step: dusting lips lightly with translucent powder using a small brush. This technique, borrowed from stage makeup, creates a matte base that grips liner and lipstick, dramatically improving longevity. It works especially well for oily skin types or in humid climates where products tend to break down faster.
The Application Sequence
Professional application follows a specific order that builds definition gradually. Start by mapping the Cupid's bow—the two peaks at the center of the upper lip. Place a dot at each peak, then connect them with small, feathered strokes rather than one continuous line. This approach allows for correction and prevents the stiff, drawn-on appearance that screams amateur work.
Next, outline the upper lip from the center outward, following the natural border where lip tissue meets facial skin. The key is to trace, not draw: the liner should emphasize what exists rather than create a new shape. Work in short strokes, pausing to assess symmetry. The outer corners require special attention—liner should taper slightly rather than ending abruptly, which can create harsh angles.
For the lower lip, begin at the center and work toward the corners in both directions. The lower lip border is often less defined than the upper, so use a light touch. Avoid dragging or pulling the skin, which distorts the shape and leads to uneven lines. If the pencil skips, it needs sharpening; a precise tip is non-negotiable for clean work.
A sharp pencil and short, controlled strokes separate amateur results from professional definition—patience in application translates directly to a polished final look.
After outlining, many artists recommend a second pass: lightly fill in the entire lip with the liner. This creates a base layer that prevents lipstick from fading unevenly and intensifies color payoff. It also ensures that when lipstick wears away from the center of the lip—which happens naturally with eating and drinking—a flattering tint remains rather than bare, pale skin.
Color Selection Strategy
Choosing the right shade involves more than matching lipstick. For a natural, definition-focused look, select a liner one to two shades deeper than natural lip color. This subtle contrast sculpts without obvious lines. For bold lipstick, match the liner exactly to the lipstick or choose a shade within the same color family to prevent a visible ring when lipstick wears away.
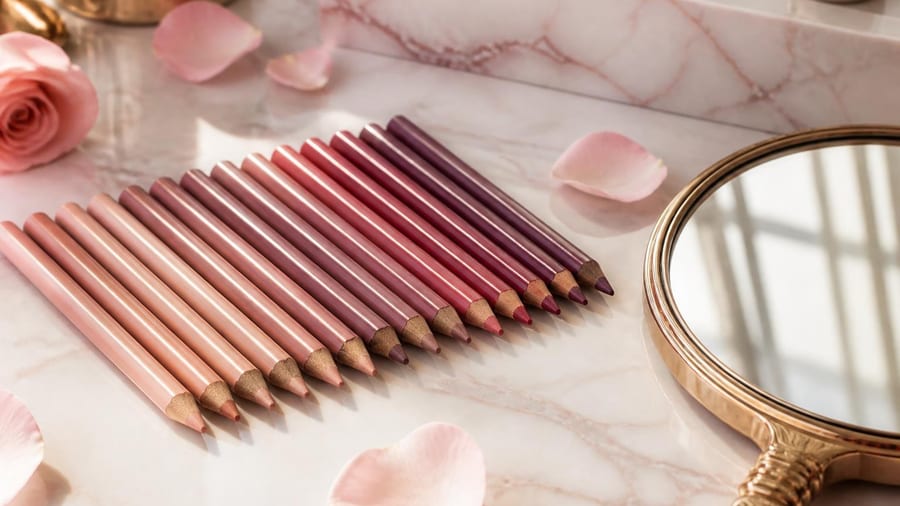
Neutral liners—taupes, soft browns, and muted roses—offer versatility. A single well-chosen neutral works with multiple lipstick shades, making it ideal for travel or minimalist makeup collections. However, trendy looks often call for contrasting liners: a brown liner under nude gloss creates the popular 90s aesthetic, while a deep berry liner under sheer pink adds dimension.
| Lip Look Goal | Liner Shade Strategy | Application Focus |
|---|---|---|
| Natural definition | 1-2 shades deeper than lips | Precise outline, minimal fill |
| Bold color longevity | Exact match to lipstick | Full lip fill-in |
| Illusion of fullness | Slightly lighter than lipstick | Strategic over-lining |
| 90s aesthetic | Brown or mauve contrast | Defined outline, sheer gloss |
Advanced Techniques and Common Mistakes
Over-lining—extending the liner beyond the natural lip border—creates the illusion of fullness but requires restraint. The key is asymmetry avoidance: over-line both lips equally, staying within 1 to 2 millimeters of the natural edge. Exceeding this creates an obvious, unflattering mismatch between liner and tissue. Focus over-lining on the center of the upper lip and the fullest part of the lower lip, where added volume looks most natural.
Blending is equally critical. After application, use a clean lip brush or fingertip to soften the inner edge of the liner, blurring the line between pencil and bare lip. This prevents the dreaded ring effect and creates a gradient that looks intentional. Some artists apply lipstick directly over liner without blending for editorial looks, but everyday wear benefits from a softer transition.
Common mistakes include using dull pencils, which tug skin and create uneven lines; skipping hydration, which emphasizes texture; and choosing formulas that are too hard or too soft. The ideal liner glides without dragging but doesn't smudge with light pressure. Test pencils on the back of your hand—it should leave a visible line with gentle pressure, not require force.
Pairing Liner with Different Formulas
Each lipstick formula benefits from specific liner techniques. Matte liquid lipsticks require full liner fill-in to prevent patchiness as the product dries. Glosses, by contrast, need only an outline; too much liner under gloss can create a muddy appearance. Satin and cream lipsticks fall in the middle—outline plus light fill-in balances color intensity and wear time.
For sheer formulas like tinted balms, choose a liner close to natural lip color and apply sparingly. The goal is subtle definition without overpowering the sheerness. Stains and tints benefit from liner application after color, a reverse technique that adds dimension without interfering with the stain's penetration.
- Matte liquid: Full fill-in with matching liner, apply lipstick immediately
- Cream lipstick: Outline plus light fill, blend slightly before lipstick
- Gloss: Outline only, apply gloss generously over liner
- Sheer balm: Minimal liner in natural tone, blend thoroughly
- Lip stain: Apply liner after stain dries for added definition
Longevity and Touch-Up Strategy
Even expertly applied liner requires maintenance throughout the day. Carry the liner pencil for touch-ups, focusing on the outer corners where wear shows first. After eating, blot lips gently rather than rubbing, which removes product unevenly. Reapply a thin layer of liner before refreshing lipstick for maximum longevity.
For events requiring 6-plus hours of wear, consider a two-layer technique: apply liner, blot with tissue, dust with translucent powder, then apply a second liner layer. This method, used by bridal and editorial makeup artists, creates a nearly bulletproof base that resists fading and feathering even through meals.
Setting sprays formulated for makeup longevity can extend liner wear, but apply them before lipstick to avoid altering the finish. A light mist over the entire face, allowed to dry completely, provides a protective layer that resists oil and moisture. Avoid spraying directly onto lips, which can cause some liners to streak.
This information does not replace advice from a qualified professional. For concerns about allergic reactions or lip health, consult a dermatologist or licensed aesthetician.